Fivekills
Administrator


Language : English
 | | Subject: Dungeoneering Mon Oct 22, 2012 2:23 am | |
| (Please note only our members logged into this website can click on our quick links)  Introduction Introduction| Skill Status: | • Free players are limited to floor 35.
• Membership can go up to floor 60. |
How to start To begin your Dungeoneering journey, assemble a party of one to five players. After completing a dungeon, you’ll receive experience, reward tokens, and prestige. These tokens serve two purposes: purchasing Dungeoneering experience and acquiring unique equipment available only through this skill. While no specific skill requirements are needed to start Dungeoneering, having decent combat skills is advisable, as the dungeons are combat-oriented. Non-combat skills enhance gameplay but aren’t essential. Forming a group is beneficial—players can leverage each other’s skill levels and collaborate to conquer dungeons. For optimal results, consider these recommended worlds: w7, w17, and w38 for non-members, and w117 and w148 for members.The Root methods
Ferry from Al-Kharid
Head to the dock behind Al-Kharid bank.
Board the ferry to Daemonheim.
Wilderness Route
Brave the deep Wilderness and head eastward.
Eventually, you’ll arrive at Daemonheim.
Ring of Kinship Teleport
Use the Ring of Kinship, provided by the tutor.
Teleport directly to Daemonheim.
MiniGame
Daily tickets are given out to play sink holes, as it's a team based minigame that is a player vs player. If you wish to learn more about Sink Holes: Click here to see our Sink holes guide.Ring of kinshipRight-click the Ring of Kinship. Open the Party Interface. Check the “Previous Progress” box at the bottom. If it hasn’t been maxed with all your floors checked off, avoid resetting. Resetting prematurely results in penalties during subsequent runs. Only reset the ring once you’ve achieved maximum previous progress. The reset message warns: “Are you sure you want to reset your dungeon progress? Your previous progress will be set to the number of floors you have completed, and all floors will be marked as incomplete. This cannot be undone.” Players aiming for maximum experience gains should follow this process diligently. Upgrades (Ring of kinship)
[Membership Only] XP Share (Ring of kinship) XP Sharing Mechanism When the XP share button is on, you receive a portion of the XP earned by other players for skill tasks you’ve completed. This includes XP from cooking, fishing, woodcutting, skilling, and even opening doors. However, it excludes XP earned from combat (fighting monsters) unless other players also have their XP share on. Restrictions You won’t receive a share of XP if the other player is doing something that requires a higher skill level than yours. For example, if your cooking level is 1 and the other person is cooking short-finned eels, you won’t get a share of their XP. Skill Doors When opening skill doors in dungeons, the opener receives more XP than others. The additional XP is x/2, where x is the level needed to open that door. For instance, a door with a mage barrier requiring level 40 magic to open gives 210 XP. The opener gets 20 more XP than others with XP share on, while all others receive equal XP, with a maximum difference of 1 XP. XP Division If one person has shared XP on, the XP is divided as 95-115. If two others have XP on, it’s divided as 83-63-64 or 84-63-63. This rule applies to all skill doors. XP Equation for Skill Doors For a skill door requiring level X to open, the XP received is: [10 + 5X]. Level 1 door gives 15 XP, level 2 gives 20 XP, and so on. Level 99 doors yield 505 XP, and there are even higher-level doors like 105, granting 535 XP (usually requiring stat boosts or membership status). Floor Sizes
Party size of 3 or more players are required for any large-sized dungon raids.
The maximum number of rooms per size is:
✘ Small: up to 16 rooms
✘ Medium: up to 32 rooms
✘ Large: up to 64 rooms
There are six floor complexity levels (ranging from 1 to 6). The team leader selects the appropriate level for themselves or the team. Members receive more experience at the end of a dungeon run based on their performance. Opting for the highest complexity level (level 6) yields the most experience from the raid. If you and your team are high-level players, tackling the highest complexity level shouldn’t be too challenging. New players should experiment and gain experience to understand which complexity level suits them best. Penalties Experience penalties do not effect you if another player dies. Path mapping When players are path mapping they take the crucial paths and look for all indicators and avoid bonus rooms one example: would be having skill doors above player levels. Now some players prefer this type of gameplay as it can speed up a dungeon raid a great percent. When doing a large five player complexity six. The party can do large dungeon raids in 7 to 10 minutes if their is not to much puzzle or activity rooms or long boss fight that is time consuming and this is a normal end time when players are path mapping. Though you will not gain is much experience from missing bonus rooms, you will do floors much faster but it's putting self afflicting penalty limits on yourselves without the game modes doing it for you. Hunter - Daemonheim (Members Only penalty) Daemonheims only count as a member resource. When killing Daemonheim hunter monsters with any type of combat without trapping will give the whole team penalties at end of dungeon raid. Guide mode Guide mode is a type of penalty that can be self inflicted and turn on or activated by going to a low complexity level 1 through 4. Game play modesGuide mode: Guide mode is an option accessible in the party interface. Enabling it will guide you through the map with only rooms that are essential for dungeon completion and removing all bonus rooms from the map when activated. However, completing a dungeon raid in guide mode will reduces experience on completion. Guide mode is always activated in complexities level 1 through 4. Hard Mode: Hard mode is for advanced players that wish for a real challenge, as NPC monsters spawn at max levels and less food will drop during the raid and rewarding higher token and experience gain. Methods and calculatorsPlayer created gatestones All players with a magic level required to cast player created gatestones should always gate doors or guarded rooms and be ready to move the group gatestone on requests. This can speed up a dungeon drastically if the whole team follows suit. Free to play room counting: When players come a crossed pay to play member rooms, they will call out P1 , P2 and count upwards. This means there is a number of member only activity rooms that can not be opened and giving insight and indicates to the rest of the team the dungeon has member rooms that can not be opened. This helps the team remember each member room and not have to look for unopened doors at the end of a raid, with a quick count by looking at the dungeon map to see their is only member rooms left and in the end saving time when their is nothing left to be done. Bonfires Using a bonfire can increases your maximum health based on the log burned. This method is best used before you join a team or host. You can also increases your maximum health if you wish to make a bonfire in the dungeon, but it's looked down on. Overload Some players will take a drink of overload before entering a dungeon raid. As this is the only potion that will not reset your stats to normal when you enter a dungeon for 5 minutes. 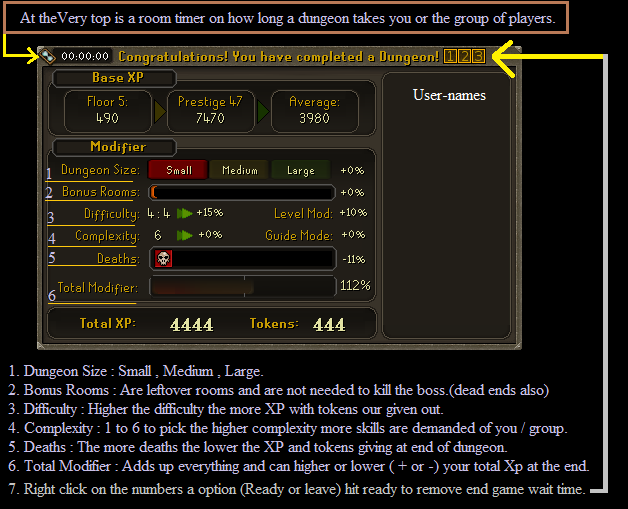 Tokens value from dungeon raid. Tokens value from dungeon raid.Experience value divided by ten equals the tokens gained. EquipmentAll dungoneering equipment are set at tier levels to try and help people remember gear sets easier. - Equipment - Dungoneering list:
Dungeoneering levels allowed to bind more items:
1 Dungeoneering: 1 item
20 Dungeoneering: 2 items
50 Dungeoneering: 3 items
90 Dungoneering: 4 items
120 Dungeoneering: 5 items
Non-Membership
Anytime you have binded items on a members would, you have the option to remove your members dungeoneering items less, you have a open un'binded spot on free to play to add to your item storage equipping space.
Tier equipment list: 1. Combat: Novite Magic: Salve Range: 2. Combat: Bathus Magic: Wildercess Range: Subleather 3. Combat: Marmaros Magic: Blightleaf Range: Protoleather 4. Combat: Kratonite Magic: Roseblood Range: Archleather 5. Combat: Fractite Magic: Bryll Range: Dromoleather - Tier 1:
Novite ( All Tier 1)
1 Attack
Novite Dagger
Novite Rapier
Novite Battleaxe
Novite 2h Sword
Novite Spear
Novite Warhammer
Novite Hatchet
Novite Pickaxe
1 Strength
Novite Maul
1 Defence
Novite Full Helm
Novite Platebody
Novite Plateskirt
Novite Gauntlets
Novite Boots
Novite Kiteshield
1 Defence + 1 Magic
Salve Hood
Salve Robe Top
Salver Robe Bottom
Salve Gloves
Slave Boots
1 Defence + 1 Range
Protoleather Coif
Protoleather Body
Protoleather Chaps
Protoleather Vambraces
Protoleather Boots
- Tier 2:
Bathus ( All Tier 2)
10 Attack
Bathus Dagger
Bathus Rapier
Bathus Battleaxe
Bathus 2h Sword
Bathus Spear
Bathus Warhammer
Bathus Hatchet
Bathus Pickaxe
10 Strength
Bathus Maul
10 Defence
Bathus Full Helm
Bathus Platebody
Bathus Plateskirt
Bathus Gauntlets
Bathus Boots
Bathus Kiteshield
10 Defence + 10 Magic
Wildercess Hood
Wildercess Robe Top
Wildercess Robe Bottom
Wildercess Gloves
Wildercess Boots
10 Defence + 10 Range
Subleather Coif
Subleather Body
Subleather Chaps
Subleather Vambraces
Subleather Boots
- Tier 3:
Marmaros ( Tier 3)
20 Attack
Marmaros Dagger
Marmaros Rapier
Marmaros Battleaxe
Marmaros 2h Sword
Marmaros Spear
Marmaros Warhammer
Marmaros Hatchet
Marmaros Pickaxe
20 Strength
Marmaros Maul
20 Defence
Marmaros Full Helm
Marmaros Platebody
Marmaros Plateskirt
Marmaros Gauntlets
Marmaros Boots
Marmaros Kiteshield
20 Defence + 20 Magic
Blightleaf Hood
Blightleaf Robe Top
Blightleaf Robe Bottom
Blightleaf Gloves
Blightleaf Boots
20 Defence + 20 Range
Paraleather Coif
Subleather Body
Subleather Chaps
Subleather Vambraces
Subleather Boots
- Tier 4:
Kratonite ( Tier 4)
30 Attack
Kratonite Dagger
Kratonite Rapier
Kratonite Battleaxe
Kratonite 2h Sword
Kratonite Spear
Kratonite Warhammer
Kratonite Hatchet
Kratonite Pickaxe
30 Strength
Kratonite Maul
30 Defence
Marmaros Full Helm
Marmaros Platebody
Marmaros Plateskirt
Marmaros Gauntlets
Marmaros Boots
Marmaros Kiteshield
30 Defence + 30 Magic
Roseblood Hood
Roseblood Robe Top
Roseblood Robe Bottom
Roseblood Gloves
Roseblood Boots
30 Defence + 30 Range
Archleather Coif
Archleather Body
Archleather Chaps
Archleather Vambraces
Archleather Boots
- Tier 5:
Fractite ( Tier 5)
40 Attack
Fractite Dagger
Fractite Rapier
Fractite Battleaxe
Fractite 2h Sword
Fractite Spear
Fractite Warhammer
Fractite Hatchet
Fractite Pickaxe
40 Strength
Fractite Maul
40 Defence
Fractite Full Helm
Fractite Platebody
Fractite Plateskirt
Fractite Gauntlets
Fractite Boots
Fractite Kiteshield
40 Defence + 40 Magic
Bryll Hood
Bryll Robe Top
Bryll Robe Bottom
Bryll Gloves
Bryll Boots
40 Defence + 40 Range
Dromoleather Coif
Dromoleather Body
Dromoleather Chaps
Dromoleather Vambraces
Dromoleather Boots
Membership
List of membership equipment has not be added in yet. Tier equipment list: 6. Combat: Magic: Range: 7. Combat: Magic: Range: 8. Combat: Magic: Range: 9. Combat: Magic: Range: 10. Combat: Magic: Range: - Tier 6:
- Tier 7:
- Tier 8:
- Tier 9:
- Tier 10:
- Customise - Ring of kinship:
Members Only.
No information added yet.
Rewards Reward traderDaemonheim reward trader is a the person to speak to if you, wish to buy rewards from the dungoneering tokens you've collecting in your adventures. The reward trader has many items for sell to non-member and member alike, free world player is limited on what they can buy but members have more options. If you wish to see your options, speak to him and a reward listing screen should give you all the rewards and details his reward shop has to offer. - Non-member:
No information yet.
- Member:
No information yet.
 Mysterious doors Mysterious doorsCongratulation unlocks for main landmass for reaching a goal level. - Mysterious door :
Level 15 Faladoor mines
________________________________________________________________________Activity Dungoneering Rooms - Skills - (Used in dungoneering):
Only Herblore is done at this time! - Cooking:
- Crafting:
2 Salve shoes
3 Protoleather boots
4 Salve hood
5 Protoleather coif
5 Protoleather shield
6 Salve shield
6 Slave robe bottom
7 Protoleather chaps
8 Salve robe top
8 Salve orb
9 Protoleather body
10 Wildercress glove
11 Subleather vambraces
12 Wildercress shoes
13 Subleather boots
14 Wildercress hood
15 Subleather coif
16 Wildercress shield
16 Wildercress robe bottom
16 Subleather shield
17 Subleather chaps
18 Wildercress robe top
18 Wildercress orb
19 Subleather body
20 Blightleaf gloves
21 Paraleather vambraces
22 Blightleaf shoes
23 Paraleather boots
24 Blightleaf hood
25 Paraleather coif
26 Blightleaf robe bottom
26 Blightleaf shield
26 Paraleather shield
27 Paraleather chaps
28 Blightleaf robe top
28 Blightleaf orb
29 Paraleather body
30 Roseblood gloves
31 Archleather vambraces
32 Roseblood shoes
33 Archleather boots
34 Roseblood hood
35 Archleather coif
36 Roseblood robe bottom
36 Roseblood shield
36 Archleather shield
37 Archleather chaps
38 Roseblood robe top
38 Roseblood orb
39 Archleather body
40 Bryll gloves
41 Dromoleather vambraces
42 Bryll shoes in Daemoheim
43 Dromoleather boots in Daemonheim
44 Bryll hood
45 Dromoleather coif
46 Bryll robe bottom
46 Dromoleather shield
46 Bryll shield
- Firemaking:
- Farming:
10 Wildercress in Daemonheim
- Fishing:
- Fletching:
- Herblore:
Dungeoneering. Booster & Other Potions. Helpful Tip: Write down herb with secondaries ingredients for fast potions inside runescape note-pad.  Summony Of Potions Summony Of PotionsA : Weak Potions. | B : Regular potions. | C : Strong potions. | D : Prayer Restore. | E : Weapon poisons. Naturalist | Gatherers | Artisan | Survivalist | | Cooking | Woodcutting | Smithing | Agility | | Farming | Mining | Crafting | Hunter | | Herblore | Farming | Fletching | Thieving | | Runecrafting | Fishing | Construction | Slayer | | | Firemaking | | |
|
- A - Weak:
| Level | Image | Potion | Ingredients | Information | |
3
|

| Magic | Sagewort & Void dust | Magic by 4 + 10 of magic level | |
5
|

| Ranged | Valerian & void dust | Ranged by 4+10% of each level | |
7
|

| Melee | Valerian & Misshapn claw | Attack , Strength by 4 + 10% of each level | |
9
| . | Defence | Aloe & void dust | Defence by 4 +10% of defence level | |
24
|

| Gatherer's | Sagewort & red moss | Woodcutting , Mining , Fishing by 3 + 2% of levels | |
27
|

| Artisan's | Valerian & red moss | Smithing, Crafting , Fletching , Construction , Firemaking by 3 + 2% of levels | |
30
|
| Naturalist's | Sagewort & misshapen claw | Cooking , Farming , Herblore , Runecrafting by 3 + 2% of levels | |
33
|

| Survivalist's | Valerian & firebreath whiskey | Agility , Thieving , Hunter , Slayer by 3 + 2% of levels | |
- B - Regular:
| Level | Image | Potion | Ingredients | Information |
36
| . | Magic | Wormwood leaf & void dust | Magic by 5 + 14% of Magic level |
38
| . | Range | Magebane & void dust | Ranged by 5 + 14% of Ranged levels |
40
| . | Melee | Magebane & misshapen claw | Attack , Strength by 5 + 14% of skill levels |
42
| . | Defence | Featherfoil & void dust | Defence by 5 + 14% of Defence levels |
57
| | Gatherer's | Wormwood leaf & red moss | Woodcutting , Mining , Fishing by 4 + 4% of levels |
60
|  | Artisan's | Magebane & red moss | Smithing , Crafting, Fletching , Construction , Firemaking by 4 + 4% of levels |
63
| | Naturalist's | Womwood leaf & misshapen claw | Cooking , Farming , Herblore , Runecrafting by 4 + 4% of levels |
66
| | Survivalist's | Magebane & firebreath Whiskey | Agility , Thieving , Hunter , Slayer by 4 + 4% of levels | |
- C - Strong:
| Level | Image | Potion | Ingredients | Information |
69
| . | Magic | Winter's grip & void dust | Magic by 6 + 20% of Magic level |
71
| . | Range | Lycopus & void dust | Ranged by 6 + 20% of Ranged levels |
73
| . | Melee | Lyocpus & misshapen claw | Attack , Strength by 6 + 20% of skill levels |
75
| . | Defence | Buckthorn & void dust | Defence by 6 + 20% of Defence levels |
90
| | Gatherer's | Winter's grip & red moss | Woodcutting , Mining , Fishing by 6 + 6% of levels |
93
| | Artisan's | Lycopus & red moss | Smithing , Crafting, Fletching , Construction , Firemaking by 6 + 6% of levels |
96
| | Naturalist's | Winter's grip & misshapen claw | Cooking , Farming , Herblore , Runecrafting by 6 + 6% of levels |
99
| | Survivalist's | Lycopus & firebreath Whiskey | Agility , Thieving , Hunter , Slayer by 6 + 6% of levels | |
- D - Restore:
Stat Restore - Restores all lowered stats to normal.  Weak Restore Weak Restore |  Regular Restore Regular Restore |  Strong Restore Strong Restore | | Aloe & red moss | Featherfoil & red moss | Buckthorn & red moss |
Rejuvenation - Restores (Does not boost) Summoning or Prayer | Weak Rejuvenation | Regular Rejuvenation | Strong Rejuvenation | | Aloe & misshapen claw | Featherfoil & misshapen claw | Buckthorn & misshapen claw |
- E - Poison:
 | Starts at 20 damage | |
 | Starts at 40 damage | |
 | Starts at 60 damage | |
Cure - Heals and protects against Disease+Poison, Protects against Dragon fire. | Weak Cure | Regular Cure | Strong Cure | | Aloe & firebreath wiskey | Featherfoil & firebreath wiskey | Buckthorn & firebreath wiskey |
Poison - Weapon Poison for Daggers or Spears. For some weird reason Poison also can hit Pickaxes, Books, Skeletons and Zombies and other things without blood circulation.
- Hunter:
- Runecrafting:
- Magic:
- Mining:
- Slayer:
 41 Night spider
- Summoning:
1 Cub bloodrager in Daemonheim (Melee)
Gold charm, novite ore
2 Cub deathslinger in Daemonheim (Ranged)
Gold charm, tangle gum branches
3 Cub Stormbringer in Daemonheim (Magic)
Gold charm, Salve nettles
5 Cub hoardstalker in Daemonheim (Forager)
Gold charm , Protomastyx hide
6 Cub worldbearer in Daemonheim (Beast of burden)
Gold charm, Protoieather torn bag
9 Cub skinweaver in Daemonheim (Healer)
Cold charm, 2 cooked heim crabs
11 Little bloodrager in Daemonheim (Melee)
Gold charm, bathus ore
- Woodcutting:
- Skill rooms in dungoneering:
- Dungeoneering skill doors:
Prayer Door:- 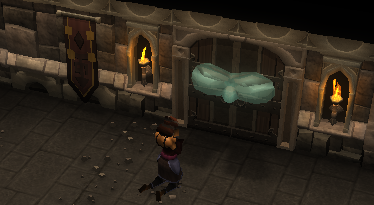 Magic Barrier: 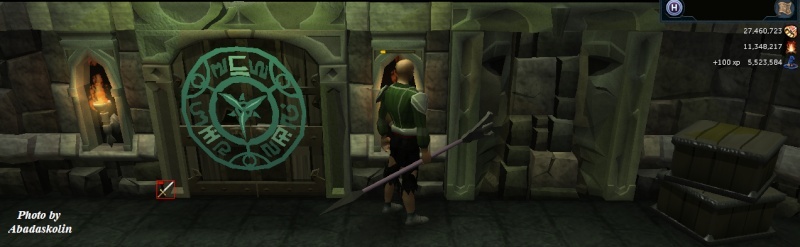 Mining Door: 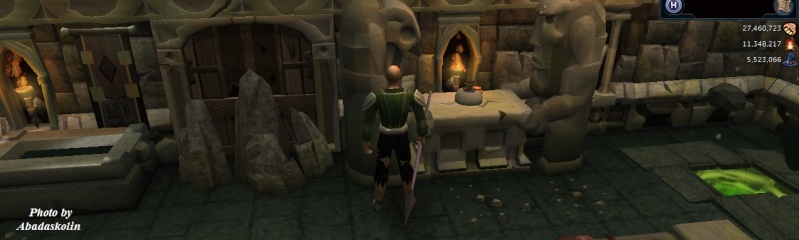 Strength Barrier: 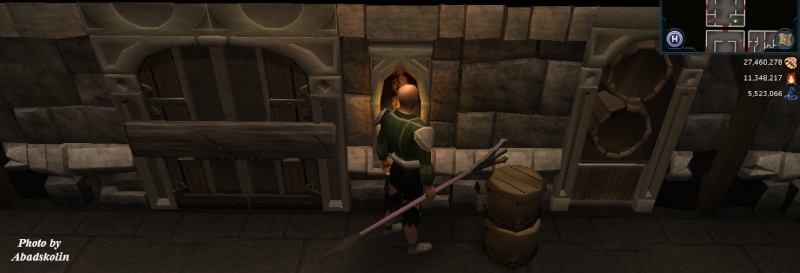 Summoning Door: No photo yet.Woodcutting Door: 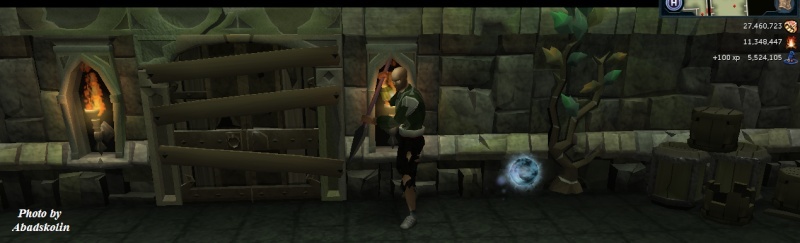 Divination Door:No photo yet.Herblore Door: Divination Door:No photo yet.Herblore Door:- Vial to mix a compound in door 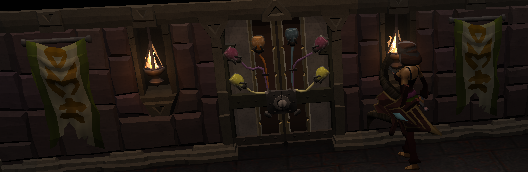
- Book Case:
Book Case: 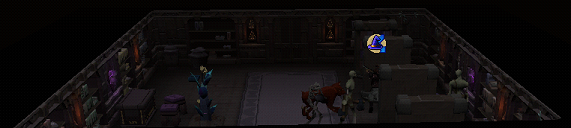 Located by the walls are four bookshelves, each coloured differently: red, blue, green, and yellow. At the same time, there are rotatable bookshelves in the middle. Every few seconds, a red, blue, green, and yellow book can travel from one bookcase to another. The objective is to place the books back into their respective shelves, e.g. red book goes back into the red bookcase.
- Crystal-Orb:
Crystal-Orb:
[Photo Here]
Before you start the Crystal-Orb room. Ground lights are activated by 4 different colored Lodestones in the corner of the room. Every color on the floor to hit the Crystal-Orb in the center of the room at the exact same time. To do this, You will need to First activate all the lodestones if any is inactivated in the corner of the room. Then, you will need to step on the pressure pads in front of each row of blinking lights to stop that light, Walk off to start again.
- Emotes:
Emote room 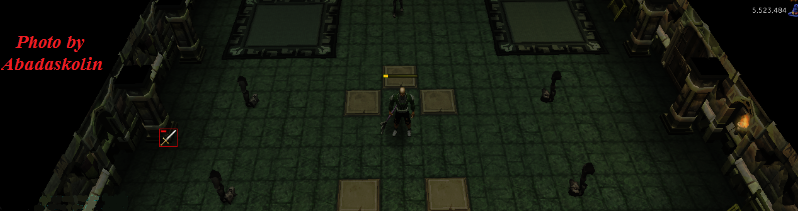
- Ferret pad:
Ferret pad:
- Ferret hunt and catch:
Ferret hunt and catch: 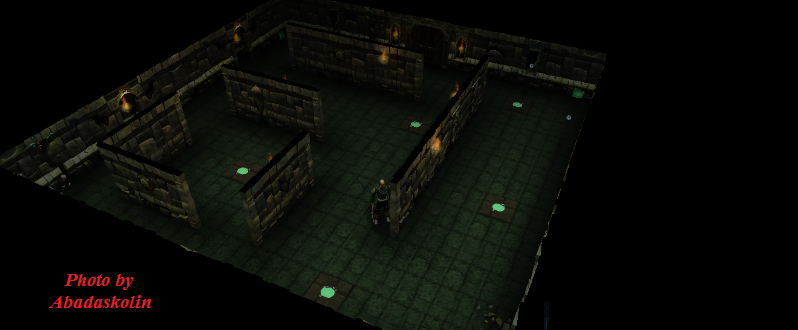 Pick Options [ a , b ] Dry branches chop from walls using a knife will make a trap set on ground to catch ferret. Placing players on the sides of the room can help catch a ferret quicker or with out have to lay as many traps.
- Fishing and throwing:
Fishing and throwing:
[Photo Here]
Fish for eel and cook on fire given in room once fully cooked use your range level to throw the cooked eel on the ground floor to move the ferret around and watch out for the yellow holes as it could make you start from a new location with the ferret the goal is to get the ferret on the Squared box on the ground to unlock the door in the room.
- hoardstalker:
| Enigmatic hoardstalker -Riddles | Image | Answer | | | | | Completed I can make you deed But currently I have no head. |

| Headless arrow | | I can get you almost anything you want, but with noone to accept me, I am worthless |

| Coins | | I am water that brings fire to your heart. |

| Firebreath whiskey | | The blunt force I provide is surprisingly constructive. |

| Hammer | | Without me, deathslinger is merely a gorajo with a stick |

| Bow string | | Though my friends fly high, I was always destined to protect. |

| Novite Kiteshield | | Remove my yellow skin and dine on me within. |

| Banana (Search food barrel) | | While many could me mould, some call me savoury. |

| Edicap mushroom | | The slowest of assassins, I am at home on your blade or in your drink. |

| Weapon poison (Search barrel) | | From your veins I flow from essence i did grow. |

| Blood rune | | Born through fire, I am lost in winds and muddied in water. |

| Ashes | | Sticks and stones may break me, excercise may ache me. |

| Bones | | I demonstrate faith in a dark god. |

| Unholy symbol | | Without me you cannot survive, but fill a room with me and you would surey die. |

| Vial of water | | I am cursed with but one eye and from haystacks I will spy. |

| Needle | | A serpent am I, yet on land I would die |

| Short-finned eel | | I pluck the denizens of the sea To serve the salty sailor's tea. |

| Fighing rod | | Thourgh I am light, I cannot illuminate the dark. |

| Feather |
- Invaluable Ghost:
Invaluable Ghost: 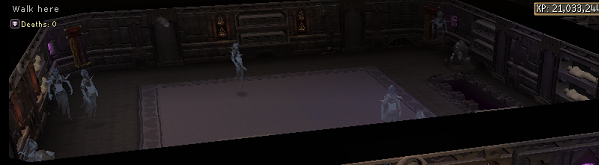 A room full of ghosts. Each ghost but one is invaluable, or non-kill-able endless he is "Hosting" a spirit. Only the ghost hosting the spirit can be killed. Once the ghost hosting the spirit is killed, the spirit will then host another ghost in which you can see him fly across the room to another ghost. Then kill this ghost. and So forth
- Monolith Charges:
- Ramokee:
A group of Ramokee:  A group of Ramokee exiles are in this room with a large Summoning obelisk in the center (which serves no purpose). The group consists of a Skinweaver (healer), Bloodrager (warrior), Stormbringer (mage), and Deathslinger (ranger). Dispatch the 1. Skinweaver ------ (Team healer) want to kill this one first. 2. Stormbringer 3. Deathslinger 4. Bloodrager
- Rune Crash:
 Rune Crash : 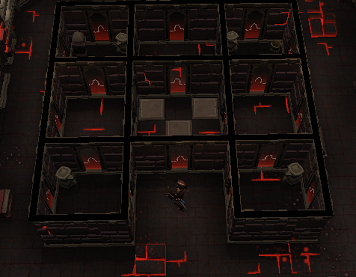 Your not allowed to bring the gate stone inside the center of maze you're only allowed to teleport to gate stone if on the outside everyone must make their way to the center to unlock. the door portals are a little random.
- Statue stone crafting:
If the statue is holding a staff, arm the opposite statue with a bow.
If the statue is holding a bow, arm the opposite statue with a sword.
If the statue is holding a sword, arm the opposite statue with a staff.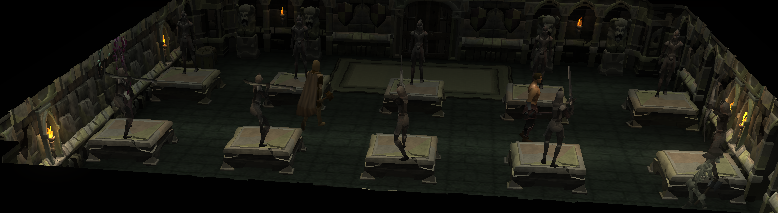 NOTE: No Sword in hand. NOTE: No Sword in hand.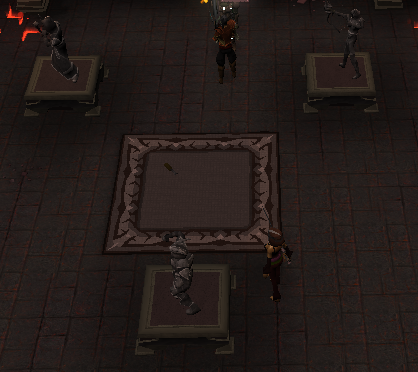
- Tile Imbue:
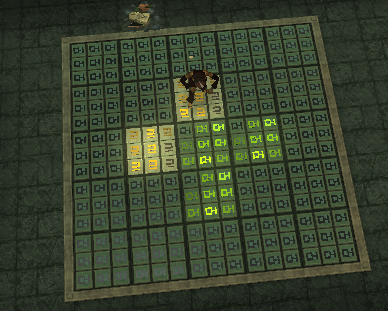 A yellow versus green tile puzzle is presented on the floor. You will be forced to use your Runcrafting skill to Imbue the tiles (4 tiles are flipped to the opposite color) and make them all the same color. This can be VERY tricky so they allow you to Force the tiles a color (This is a single tile imbue). It's quite simple to get the hang of.
________________________________________________________________________
Dungoneering Bosses
All the bosses offer one players a random reward from their drop table with a end-game loot reward from 1 though 10 tier item(s).
Dungoneering account levelers require everyone inside party to be on same theme names. This allows lower level dungoneering accounts to access the party floors, without having the dungoning levels required, but by not going on your highest floor, players get little bit less Experience. Now go out and have fun on your boss encounters.
How long should a large party dungoneering run take up to?40 plus minutes - Bad 35 or less minutes - Average 30 or less minutes. - Good 20 or less minutes. - Excellent - Player quick message meanings:
Sk - Skill is needed
- Gategroup stone quick message meanings:
DE - Dead end.
GD - Guarded door.
GT - Gatestone teleport.
DENK - Dead end no key.
MGS - Move group gatestone.
GTB - Group gatestone at boss.
MGTB - Move group gatestone to the boss.
MGT - Move group gatestone to your gate.
GTE - Teleport to group gatestone to end the floor.
BUY - Offering to take gatestone to new gated location.
- Key quick message meanings:
- Frozen (Floors 1-11):
Gluttonous Behemoth  Gluttonous Behemoth Heals by eating bovimastyx carcasses. 1. Stand between Gluttonous Behemoth and the carcasses to prevent Healing. 2. Weakness is crush attack damage. Astea Frostweb  Summons Ice spiders, switches between all three protection prayers and can use ice barrage. Her weakness is range. Even while using protection prayers, she can still kill you. Icy Bones 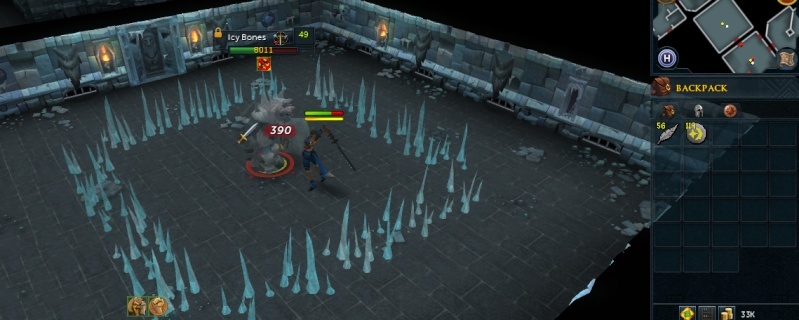 Creates damaging stalagmites the around room that block movement, stand next to icy bones to avoid. Uses Melee and a Ranged technique. Can hit through Prayer. Luminescent Icefiend  Calls forth a barrage of icicles that must be avoided by running around the room until the icicles stop (the icicles cannot kill you). Uses Range and Magic. Plane-freezer Lakhrahnaz  Players must slip across ice to reach the boss, who pushes them away. Uses multiple styles and can hit all players simultaneously with Ranged technique. To'Kash the Bloodchiller  Freezes the player and then shatters the ice for increased damage. Can hit through Prayer. If you are doing this with 2 people, the other player can unfreeze you without getting hurt.
- Abandoned 1 (Floors 12-17)
Also found in Abandoned 2: Divine Skinweaver, Skeletal Horde  The Divine Skinweaver heals players during the Skeletal Horde, which keep spawning until the entrance routes are blocked off. You must stay near her or she will not heal you. Only block the tunnels when the Divine Skinweaver tells you to. Attempting to block entrances too early results in damage. Hobgoblin Geomancer. 1. Hobgoblin can disable and heal himself off a players prayer points when any prayer is on. 2. Uses curse spells to weaken you. 3. Binds a player than teleports around the room using magic spells on you. Bulwark beast Armour must be broken off with crush attack use pickaxe before any real damage can take place. Bulwark beast uses magec and range attacks. Fight information: Once armour bar is gone any type of attack sytle is allowed. Unholy cursebearer  Magic and Melee (Reduces the player's combat stats) Using the Unholy Font can restore your stats also at the cost of healing cursebearer.
- Furnished (Floors 18-29):
Rammernaut Occasionally charges at the player, Stunning and reduces defence and disables prayer for lmited time. 1. Any prayer in room will make rammernaut be more aggressive. 2. Best way to kill Rammernaut is Magic Attacks. Stomp A Player must avoid falling rocks while collecting lodestones to have Stomp from healing at three intervals. A player must charge the lodestones 3 times to kill Stomp, and having a pick will allow you to mine the a rock out of your path way. The pick in your tool-belt works for this job. Har'Lakk the Riftsplitter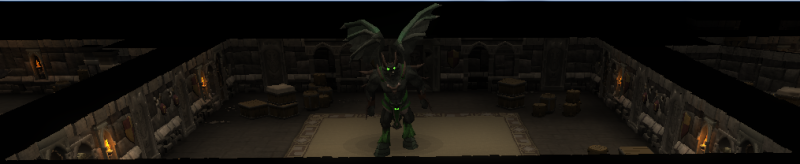 Har'Lakk the Riftsplitter Drains prayer and creates portals. If a player prays against Har'Lakk with melee than will hit through the prayer. Best to kill Har'Lakk with magic spells.Stat reduction effects. 1. Purple drop lits Poison. (The effects of the poison have worsend.) 2. Red drop lits damaging. (You are Injured and take on damage.) 3. Black drop lits (You feel your strength being sapped from you.) Lexicus Runewright Hood Deflects up to 1/3 melee damage that you deal, summons books that attack with mage, range, and melee (the books can be attacked). He uses a "Book Barrage" that is capable of killing a player in one hit if hit directly. When he says Book Barrage, get away; multiple books will go toward your spot and explode, dealing heavy damage.. His weakness is Ranged and Melee. Sagittare Has protect from range for the duration of the battle and teleports around the spiral-shaped room. Occasionally makes the player unable to run. His magic attack can bind a player to a spot for 10–15 seconds. Night-gazer Khighorahk  Periodically has an attack that smashes the ground and knocks back players using melee. Players must light "pillars of light" (tinderbox not required) in the corners of the room in order to do damage to the first form. Respawns after it is killed the first time in a weaker form. Can stun a player for up to 20 seconds, depending on the boss's combat level.
- Abandoned 2 (Floors 30-35)
Also found in Abandoned 1: Shadow-forger Ihlakhizan 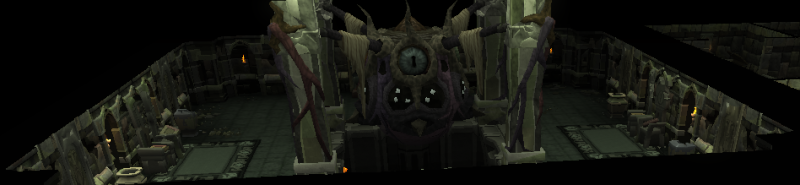 Uses two kinds of area attack (spitting and spinning body which is melee based) and periodically sends out a force that deals heavy damage and reduces target's stats dramatically if hit. Can very easily kill players in a few seconds. Bal'lak the Pummeller 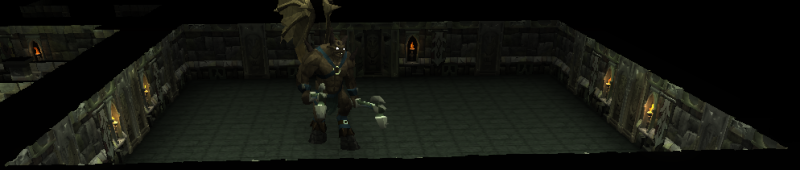 Has a defence that increases over time. Lure onto green portals or teleport out of the room to lower his defence. If teleporting out it takes approximately 30 seconds to fully reset defence.
- Occult (Floors 36-47):
Skeletal trio Three skeletons who use one individual attack style. It is recommended to kill the mage first, then the warrior, and lastly the ranger. (A helpful tip is to have someone on your team bring some sort of binding spell for the warrior, he CAN be bound to his spot.) Runebound behemoth Protects against all forms of combat. Disenchant the crystals to temporarily keep him from praying from a particular type of combat. Gravecreeper Protect against range when you face him. His special attack is similar to that of the Rift splitter and can be easily escaped by moving away from it. Make sure to stay away from the purple insignias on the floors as those vents also release a special attack. Beware of him as he also keeps moving around the room through the vents. Overall, this boss is a major problem for all dungeons. Necrolord 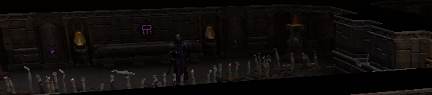 A necromancer who will summon impassible obstacles near him, thus either ranged or magic is a must for this boss. Summons skeletons to fight with him. Flesh-Spoiler Haasghenahk  The Flesh-Spoiler is similar to the Kalphite Queen in terms of transformation. When it's first form is killed, it's outer body explodes and spawns Flesh-Spoiler spawns to help it. Best to just tank Flesh-Spoiler with protection prayer off. Yk'Lagor the Thunderous  You must kill the mages who are trying to absorb its power until Yk'Lagor says "My turn!". You can start attacking it right after he says "You dare steal my power!". When he says "Come closer!", he will drag you across. When he says "This is...", it will take a few seconds before he says "TRUE POWER!", which you will take a lot of damage with. To evade these two special attacks, simply hide behind the pillars in the room and use melee prayer when attacking Yk'Lagor the Thunderous.
- Warped (Floors 48-60):
Blink  Dreadnaut 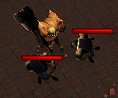 When fighting best to keep boost mage prayer on mystic might or if you have augury unlocked. Mystic Might , Augury , Leech mage. Hope devourer 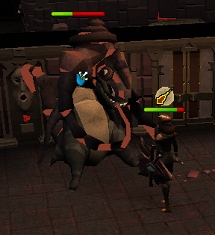 
 Thanks for reading my guide hope it has helped! Please: note this was written by the dungoneering smuggler.  2011 Updated 2014 Original-Inc.
Last edited by Fivekills on Sun Aug 03, 2014 6:56 am; edited 191 times in total |

 is a trademark of Jagex


